
EMAIL:
lh@longhuamachine.com
TELL/whatsapp:
+8619305527239  English English

Views: 0 Author: Site Editor Publish Time: 2026-10-21 Origin: Site


You will learn how a die casting machine works, step by step, from start to finish. This article explains the exact sequence of actions the machine performs to turn molten metal into a finished part. The die casting process moves through five clear stages: preparation, injection, cooling, ejection, and finishing. Each stage depends on the one before it. You will see how this metal forming process delivers speed and accuracy at scale. The global die casting market reached USD 55.4 billion in 2025 and may hit USD 156.9 billion by 2036, growing at 10.0% annually. That growth shows how vital this metal casting process has become. You will also learn how the die-casting method handles complex shapes with repeatable results.

Die casting has five main steps: preparation, injection, cooling, ejection, and finishing.
Proper preparation includes cleaning and lubricating the mold and heating the metal to the right temperature.
During injection, high pressure forces molten metal into the mold to create detailed shapes.
Cooling and solidification require controlled pressure to prevent voids and ensure strong parts.
Finishing steps like trimming and inspection make sure the final part meets quality standards.
Preparation sets the foundation for every successful run. You begin with a die casting machine that is clean, heated, and ready to receive molten metal. This stage covers two critical tasks: caring for the mold and bringing the metal to its proper temperature.
The mold, often called a die, is typically made from steel and is specific to each project. You must clean it thoroughly before every production cycle. Ultrasonic cleaning works well here. You submerge the die in a heated ultrasonic tank at approximately 80°C for about 5 to 15 minutes. High-frequency sound waves create cavitation bubbles that gently remove oxides, release agents, oil, and other contaminants. After cleaning, rinse the die with air bubble agitation for about one minute. You may then apply a dewatering or hot passivation treatment for roughly one minute to prevent corrosion. Finish with a manual inspection to confirm quality standards.
Lubrication follows cleaning. Die-release agents are applied by spray, with concentration tuned to casting complexity and die temperature. Plunger lubricants reduce friction during the shot. Ejector lubricants keep the ejection system moving freely. Anti-soldering products prevent molten metal from sticking to the die surface. Water-based systems provide cooling during application, while oil-based and synthetic systems serve as carriers for the lubricant.
You heat the mold to a controlled temperature before injection. This step prevents premature solidification and helps the metal flow into every cavity detail. Meanwhile, you melt die casting alloys in a furnace. The choice of metal affects the entire die casting process. Zinc melts at 385°C (725°F), which makes it ideal for hot chamber die casting. Magnesium has a higher melting point, around 1100°F (593°C), and can still work in hot chamber die casting despite the extra heat required. Aluminum withstands high operating temperatures and suits cold chamber die casting. These differences explain why types of die casting split into hot and cold chamber die casting methods. Each metal demands its own thermal profile.
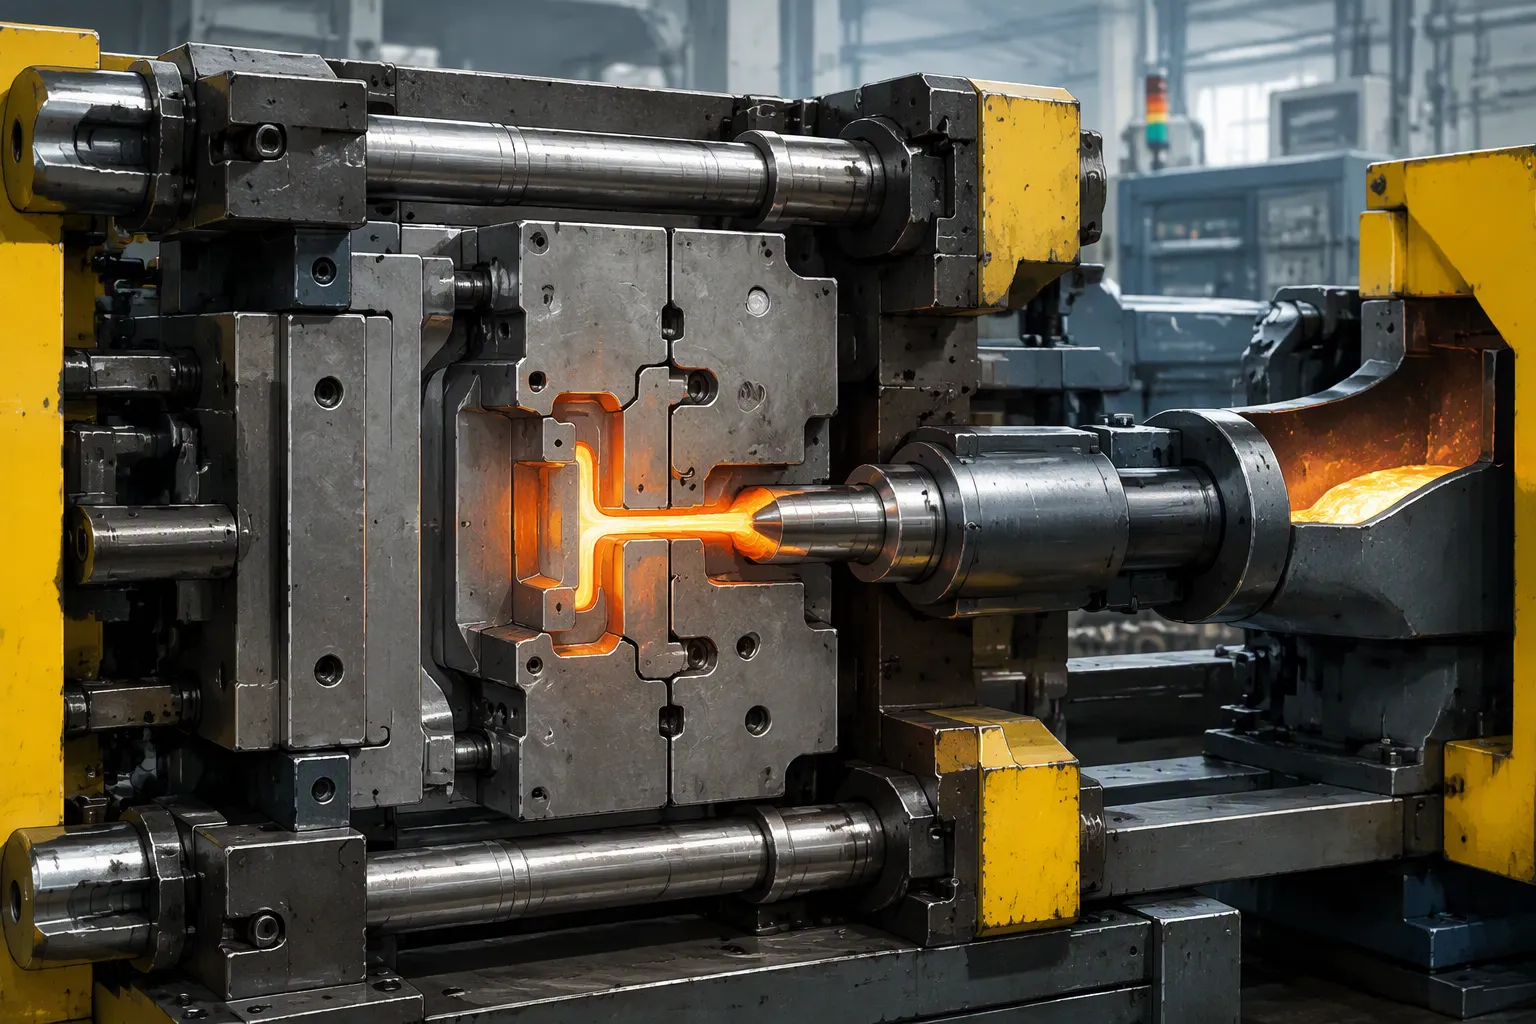
Step 2: injection is the heart of every die casting operation. This is where the die casting machine transforms liquid alloy into a shaped part. The die casting process now shifts from preparation to action. You close the die, then force molten metal into the mold's cavity under intense pressure. The high pressure die casting process depends on both actions working together.
You must lock the two halves of the die together before any metal injection begins. The clamping force holds them shut against the force of the incoming metal. This force matters more than many operators realize. Insufficient clamping lets the opening force from injected molten metal push the die halves apart. Flash forms, cavity pressure drops, and porosity rises. Excessive clamping offers no quality benefit and instead accelerates wear on dies and tie bars. A tier-one automotive supplier once specified an 800-ton machine for a transmission housing. Intermittent flash appeared after months of good production. A 12% hydraulic pressure variation had dropped actual clamping force below 720 tons. The fix cost roughly $85,000 in downtime, rework, and hydraulic upgrades.
Clamping Force Condition | Mechanism | Effect on Casting Quality | Additional Consequences |
|---|---|---|---|
Insufficient | Opening force from injected molten metal (pressures exceeding 200 MPa) pushes die halves apart | Flash forms; cavity pressure drops; incomplete fill and higher porosity | Die faces damaged; dimensional drift; shortened tool life |
Excessive | Clamp force exceeds what is needed, over-stressing dies and tie bars | No corresponding improvement in part quality | Accelerated wear; tie bars stretch and lose preload; energy consumption rises |
Clamping force does not act alone. It interacts with injection speed, die temperature, and release agent application. A machine that holds its set clamping force within ±1% of target delivers more consistent results than one with looser tolerance. This is why some 800-ton machines outperform others at the same rated tonnage.
A pneumatically powered plunger pushes molten metal from a reservoir into the die cavity. This is the core of metal injection. High pressure forces the metal to fill intricate shapes and fine details. Typical injection pressures in high pressure die-casting range from 10,000 to 20,000 psi. Modern machines can operate at injection pressures up to 100 MPa (14,500 psi). The injection pressure depends on the use case, but usually ranges from 1,500 to 25,000 PSI.
Injection velocity controls how the liquid metal flows inside the mold. At 1.5 m/s, the liquid metal filling in cavity 1 is fast, causing front metal atomization that impacts the cavity wall in all directions after reflow. The reflow combination of metal and flow is not intact, and a small amount of gas forms after solidification, scattering small holes. Compared with 1.0 m/s, the hole size at S2 significantly decreases at 1.5 m/s, but a single hole at S2 has a larger area and is uniformly distributed in the center.
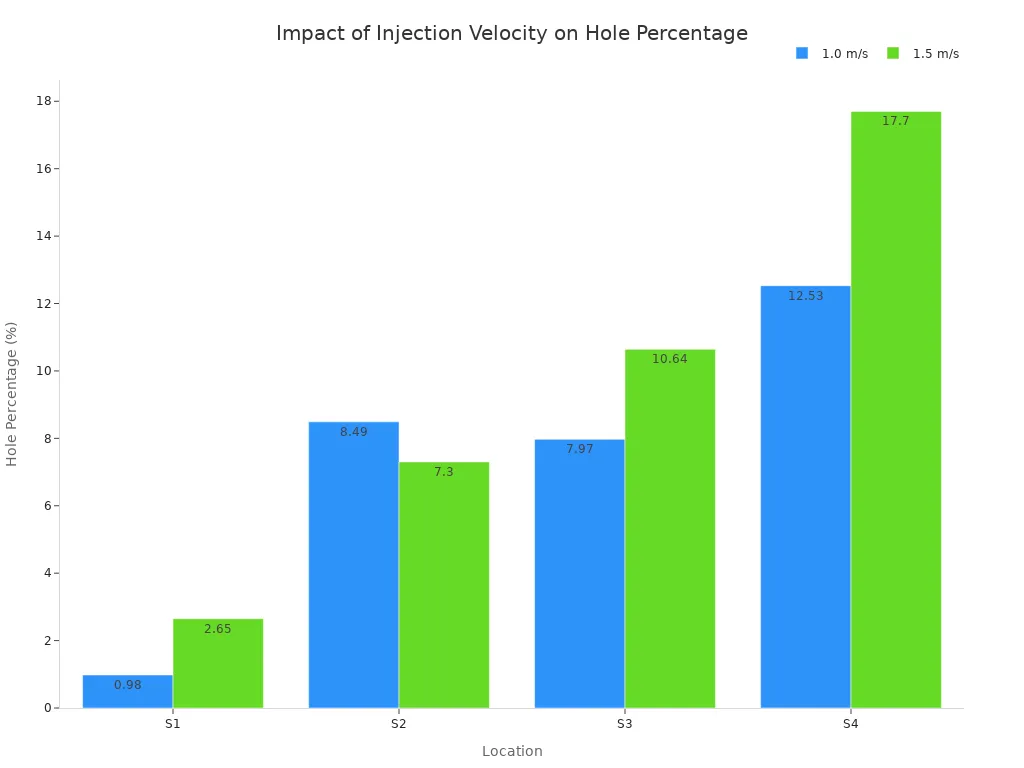
At 1.0 m/s, liquid metal first enters cavity No. 3 with relatively stable flow; at 1.5 m/s, splashing occurs extensively at the flow front upon entering the same cavity.
As flow advances, at 1.0 m/s splashing produces more cavities in cavity No. 1; at 1.5 m/s the flow state is more chaotic with severe splashing.
During mid-filling, at 1.0 m/s the flow front in cavity No. 1 passes the boss smoothly; at 1.5 m/s the flow front is close to the filling end.
At later filling stages, at 1.0 m/s liquid metal accumulation in the boss hinders subsequent flow; at 1.5 m/s much liquid metal enters the overflow groove.
At final filling stages, at 1.0 m/s vortex structures form at corners of cavity No. 3; at 1.5 m/s cavity No. 1 is filled.
The flow state of liquid metal in the mold cavity significantly affects hole defects during casting. Injection velocity is one of the controlling factors of this flow state. Whether you run hot chamber die casting or cold chamber die casting, the same principle applies. The die casting process rewards careful control of both clamp force and injection speed.
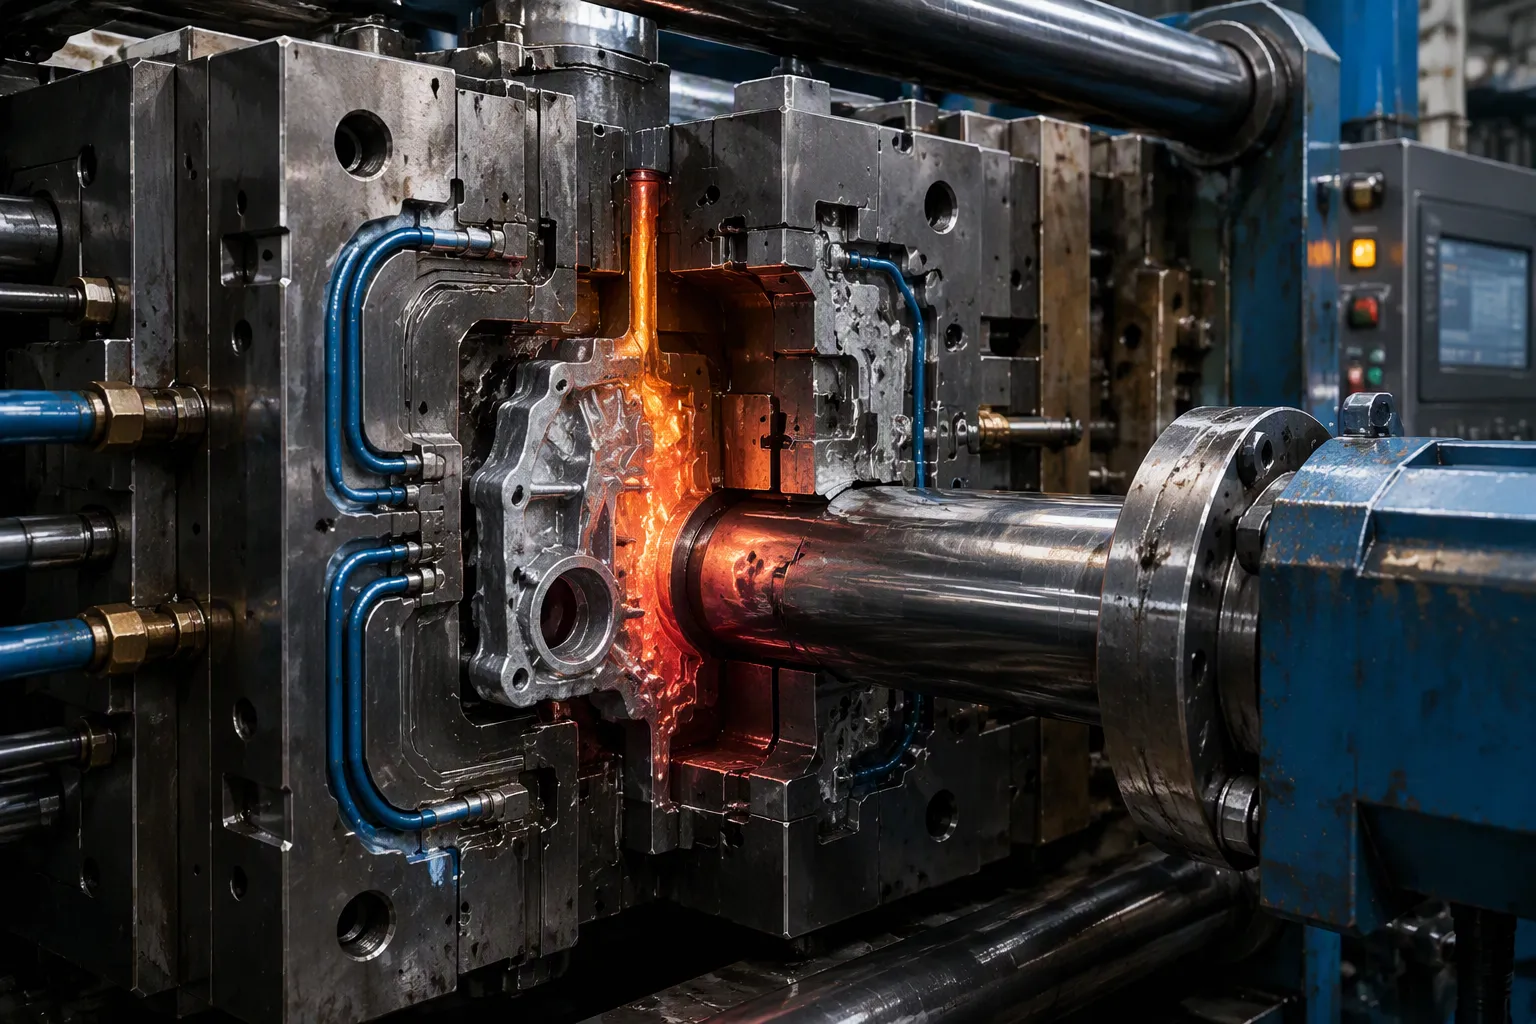
After the shot ends, the die casting process steps shift from filling to freezing. The metal inside the die cavity now cools and takes the shape of the mold. This stage decides whether your part comes out sound or riddled with internal voids. You control two things here: how the metal cools and how long you hold pressure on it.
The molten metal begins to lose heat the moment it touches the die surface. Heat flows from the liquid alloy into the steel die, which carries it away through internal cooling channels. The metal closest to the die wall solidifies first, forming a skin. That skin thickens inward until the entire cross-section becomes solid. The part now mirrors the cavity shape.
Cooling rate depends on several factors. Wall thickness matters most. Thick sections hold heat longer and take more time to freeze. Thin ribs and bosses lose heat fast. Die temperature also plays a role. A hotter die slows solidification. A cooler die speeds it up. You must balance these factors for every geometry you run.
Uneven cooling creates problems. If one section freezes before another, the still-liquid region cannot draw metal from the already-solid area. Shrinkage voids form. You see them later as porosity on a machined surface or as a leak path in a pressure-tight part. High pressure die-casting reduces this risk by keeping the metal under pressure during freezing. The same principle applies whether you run hot chamber or cold chamber die casting.
Pressure does not stop when the cavity fills. The die casting machine keeps the plunger forward and maintains intensification pressure throughout solidification. This step separates a good die casting from a bad one.
Intensification pressure is maintained to minimize shrink porosity as the aluminum solidifies.
The mechanism is simple. As the metal cools, it shrinks. Without extra pressure, that shrinkage pulls metal away from the die wall and leaves voids. Holding pressure forces additional metal into the cavity to compensate. The result is a denser, stronger part.
Holding pressure during the cooling phase helps reduce porosity that results from shrinkage.
Timing matters just as much as pressure level. You must hold long enough for the gate to freeze. Once the gate solidifies, no more metal can enter the cavity. Pressure after that point does nothing.
If holding time is too short, pressure has less opportunity to stabilize dimensions and support the casting as it transitions into solidification.
Maintain consistent holding pressure during solidification. This helps prevent shrinkage porosity by forcing additional metal into areas that might otherwise form voids.
Consistency is the key word. A die casting process that varies its holding pressure from shot to shot produces parts with inconsistent density. You want the same pressure profile on every cycle. That repeatability is what makes high pressure die-casting reliable for demanding applications. The die casting process steps you follow here determine the internal quality of every part you ship.
Step 3: cavity ejection begins once the metal has fully solidified. The die casting machine now shifts from holding pressure to releasing the finished part. This stage demands precision. A careless ejection damages the casting, wears the dies, and slows your cycle. You must open the mold and push the part out without leaving marks or distorting its shape.
The die casting machine releases the clamping force and separates the two die halves. One half stays fixed. The other slides back to expose the casting. This action must run smoothly. Any hesitation or misalignment can drag the part across the die surface and scratch it.
The die casting process now depends on proper draft angles. Draft lets the part release without resistance. Insufficient draft increases the force needed to free the casting. That extra force worsens surface damage and raises the risk of warping. You should set draft angles based on actual release conditions, not guesswork. The advantages of die casting — speed, accuracy, and repeatability — all rely on clean separation at this moment.
Ejector pins push the solidified casting out of the die. You position these pins on non-visible or non-cosmetic surfaces, such as gate or overflow zones. Place them on structural features like ribs or bosses to distribute force evenly. Flat, perpendicular surfaces work best. Round pins suit general use, while square or rectangular pins handle jobs that need more force or contact area. Hardened steel resists wear for most applications. Coated pins like nitrided steel work well for abrasive metals.
Pin design directly affects surface finish. Too few or undersized pins concentrate force and damage the casting surface. Ejecting too early, while the part is still hot and weak, causes distortion. You should distribute adequate ejector area across structurally sound regions, control ejection timing against part temperature, and polish and inspect pin surfaces regularly. This step 3: cavity ejection phase separates good high pressure die-casting from poor high pressure die-casting. Whether you run hot chamber die casting or cold chamber die casting, the same rules apply. High-pressure die casting allows for high production rates and intricate shapes, but only when ejection is engineered around the casting.
After ejection, the part still carries excess material. You must remove flash, runners, gates, and overflows before the die casting ships. This stage completes the die casting process and prepares the part for its final application.
Several methods handle this work. Manual trimming suits small production lots and complex profiles, though it carries the highest labor content. Trim dies provide repeatable and fast flash removal on stable parts. Abrasive or deburr equipment removes residual fins. Chemical and thermal routes apply in special cases with strict compatibility and safety checks. For runner and gate removal, vibratory degating shakes or tumbles parts so the gate breaks away with little force. Trim degating uses a clean cut for larger parts or those needing higher surface finish quality. After removal, you can remelt and recycle leftover gate, runner, and sprue material.
Surface treatments change how the die casting looks and performs. Anodizing creates an oxide layer for finish, color, and surface protection on suitable cast aluminum. Powder coating applies a cured colored protective coating for housings, covers, and brackets. Electroplating provides a metallic finish or decorative appearance. Shot blasting removes scale and adjusts texture. Passivation improves surface chemical behavior for corrosion or coating requirements. These options let you match the die casting to its service environment.
Inspection confirms the part meets specification. You start with visual inspection for cracking, tearing, holes, voids, non-fill, distortions, and bends. Dimensional inspection uses micrometers, thread and plug gauges, CMM machines, and functional gauges. Chemical inspection with X-ray fluorescence spectrometry verifies alloy composition. Non-destructive testing includes dye penetrant inspection, radiographic testing, and ultrasonic testing for internal defects. Destructive testing covers tensile testing and hardness testing. Casting alloys typically follow ASTM, AMS, and SAE specifications. The advantages of die casting — precise and complex parts with excellent surface finish and dimensional accuracy — only hold when finishing and inspection run consistently. The limitations of die casting, such as flash formation, demand this final attention. Whether you run hot chamber die casting or cold chamber die casting, finishing determines what the customer receives.
You know the five stages of die casting: preparation, injection, cooling, ejection, and finishing. Each stage feeds the next, forming a continuous casting process. Die casting rewards speed, accuracy, and repeatability. Die casting delivers precise parts at high production rates. The advantages of die casting include excellent surface finish and tight tolerances. The limitations of die casting, such as flash, demand careful finishing. Every die casting run depends on the die casting step before it. This casting process works best when you control each stage. Die-casting machines turn molten metal into finished parts with remarkable consistency. Die-casting success comes from understanding the sequence. Master die casting once you break it down step by step.
Zinc melts at 385°C (725°F) and suits hot chamber methods. Magnesium needs around 1100°F (593°C) and still works in hot chamber systems. Aluminum handles high temperatures and fits cold chamber methods. Your choice depends on the part's needs and the machine type.
Clamping force holds the die halves shut against incoming metal. Too little force lets the die open, which causes flash and porosity. Too much force wears out dies and tie bars without improving quality. You want consistent force within a tight tolerance.
Injection speed controls how liquid metal flows inside the cavity. At 1.5 m/s, splashing creates scattered small holes. At 1.0 m/s, flow stays more stable in some cavities. You must tune speed for each part geometry to reduce porosity.
Metal shrinks as it cools. Holding pressure pushes extra metal into the cavity to fill that shrinkage. This step prevents internal voids and makes the part denser. You must hold long enough for the gate to freeze.
You trim flash, runners, and gates after ejection. Surface treatments like anodizing or powder coating change appearance and protection. Inspection checks dimensions, alloy composition, and internal defects. These steps ensure the part meets its specification.
